How To Use Google Search Console ( Google Webmaster Tool )
Author : Hardeep Singh
May 22, 2026
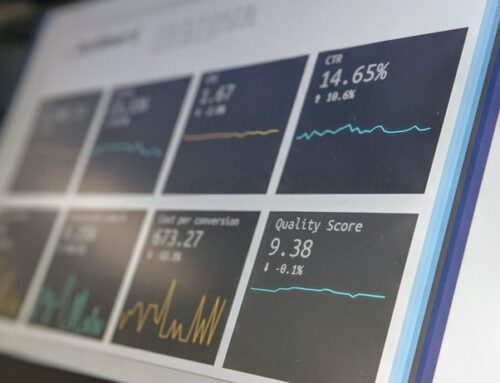
In this Blog we are going to cover everything that you need to know about Google webmaster tools or what is now refer to as the Google search console and the reason you really want to make sure that you are using this free account is because when Google crawls your website they give you a report telling you what they like and they dislike about your site this way you can use this information to improve your site boost its performance and help it to rank higher in search results so here we’ll take a close look at the different sections of Google Search Console Tools so you know what each section is for how you can benefit from it and how to use it first things first you’re going to need to set up your account it’s pretty quick and painless to do you’ll start by signing into your Google account which you probably already have once you are in Google Search Console Tools you can simply insert your URL here and click on add property now once you’ve added your property Google wants to know that you are actually the owner of this website so they’re going to give you a few ways to actually verify the ownership the first option that they’re going to give you the recommended option is to upload an HTML file so all you would need to do is click on the file to download and then you can log in via FTP or you can log into the file manager that you can access through your cPanel through your hosting account upload this HTML file you can then verify that you own the site by clicking on the link that they provide you here in step number 3 and then you’ll click on verify here below now if you don’t feel comfortable uploading that HTML file they do give you a few alternate methods that you can use as well so you’ll be able to add a meta tag to your site you can log in to your domain name provider an easy one if you already have Google Analytics setup is to connect your accounts and they’ll be able to see the tracking code is already there as well or using Google tag man so whichever option you use it doesn’t really matter so pick the one that feels most comfortable to you that you can do in the fastest amount of time but once this step is done your count is ready and you can begin so let’s go ahead and start walking through your Google Search Console Tools account now that your account has been set up you will be presented with your Google search console dashboard and this is going to give you an overview of what is going on with your site and show you anything that needs your attention so at the top and our new and important this is going to point out any messages that Google has sent you any issues that should be brought to your attention so that way you can look into those and take action on them to make sure that you increase your site’s ability to be rank higher you’re going to see a few areas below on your current status it’s going to let you know if they have crawled your website and if they see any errors during that crawl that way you can resolve any of the issues so the next time they crawl your site that will be resolved and they can index more of your site under search analytics you’ll be able to see more about how often your site has appeared in search results and look into further information about that but we’ll get into more of that in a bit as well and then also here’s where you will be able to submit a sitemap it will let you know if you have a sitemap that has been submitted and what is going on with that as well it really pays to spend a few minutes adjusting your settings in your search console account so that you’ll receive better information using this account so you’ll notice in the upper right hand corner there’s a Settings icon and when you click on that you’re presented with several different options so I want to go through these one by one so you can see what you actually need to set so you can do this alongside with me if you’d like these are all relatively quick updates to make so we’re going to start with the search console preferences now here this is where you are going to either enable or disable email notification so you absolutely want to make sure that you have your email notifications because that way when Google crawls your site if they notice any errors they’re going to email you about it that way you don’t have to log in just to see if they have sent you any messages so absolutely make sure that you’ve set that now the next option is site settings now this is a very important one this is where we want to set our preferred domain and the default option is going to be don’t set a preferred domain but this is where you want to tell Google whether you want your WW or your non WWW version of your website to be your main website so select the one that is what you would like to be your preferred domain and click Save when you do this you’re going to receive a message that says part of the process of setting up a preferred domain is to verify that you also own the other non WWW version and the reason for this is because Google actually sees your two versions of your website as two different web sites so you’re going to go through the same process that we walk through earlier and then you can select whether you want Google to limit how often they crawl your site or if you just want to let them determine that so I prefer to let them determine that taking a look at the next one we have a change of address so this is nothing that you’ll need to do in the beginning but in the event where you decide to change your domain name this is going to give you a checklist of what you would need to do to really notify Google that you are changing your domain so you would come here it’s going to give you the checklist of the different steps that you can take and you’ll be able to submit the change of address request directly to Google here the next is the Google Analytics property now this is where you’re going to be able to select from a list of any of the analytics web properties that you already have set up in your account so if you have several you’ll see them here if you only have the one that you’ve set up for this particular site that will be listed here so I’m going to go ahead and select the one that’s listed here and I will click on save it’s going to just ask you to confirm you click OK and that’s it and now you have linked your Google search console account with your Google Analytics account so let’s see what’s next we have users and property owners so you of course are already going to be a user on the account if you would like to add someone else who can help manage your account or who is able to view information you can add them here so all you do is you’re going to put in their gmail account and then you’ll be able to select whether they have full permission where they can pretty much do what you can do on the account or if you want to restrict that so if you want to look at the specific roles that the different users have you can click this link here it’s going to tell you specifically what can and cannot be accessed the next one is verification details now this is something we’ve already done this is going to just let you know when someone has tried to verify the account whether that’s fail whether that’s exceeded and how they went about verifying the ownership of this site the very last one here is associates so this is if you would like to add any new Associated user so this is often used if you want to have an app in association with your website and let’s say you would like for Google on certain occasions to send users directly to the web app versus your web site this is going to help you set that up here so as you can see there’s just a few settings here that you really need to just update it only takes a matter of a minute or two to complete but it can make all of the difference now if you ever get stuck as we move forward or as you’re setting up any of these settings here you can click on this help icon here and this is going to take you right into the search console help where you can type in your different questions it’s going to present you with all the documentation so this is a really quick way of finding answers if you need more help as well now to kick things off in the navigation bar let’s start with the messages section now Google can send you a variety of messages and these are really messages that are going to alert you to any problems that Google finds but also to give you tips on how you can go about improving your site so that it will help improve your rankings as well so again we looked at how to be notified by Google via email if send us a message do make sure that you set that up but I want to talk for a minute just about the types of messages you may receive just you understand how important it really is Google will notify you if they find an increase in errors on your site so let’s say if you have a high number of 404 errors or page not found errors then they will notify you of that so you can go and look into what the problem is and resolve it you may know how important it is to have a mobile-friendly website and if Google detects any issues with displaying your website and mobile devices they’re also going to notify you of that in your account as well on top of that of Google cannot actually access your site for any reason they’re going to let you know that they attempted to crawl the site but we’re unsuccessful so you can look into why they may not have been able to actually crawl your site if your site has any malware or it was hacked they will also notify you via your account so that you can quickly fix that issue and make sure that your site doesn’t get harmed in the search engine rankings and of course that you’re not harming any of your visitors as well because Google when they find an issue they’re going to let visitors know so you want to make sure that’s taken care of as quickly as possible now you can also receive manual actions against your site from Google as well and if they find that you have violated any guidelines then they will notify you of that and they will manually penalize your website but this gives you the opportunity to know about this manual action it allows you to go in and fix any of the issues that may have violated the terms and then you would be able to submit your website for a reconsideration request so this will tell Google that you have resolved any of the issues that they have found and this is a way of letting them know that you’re working towards resolving the issues and asking them to reindex your site so this is just an idea of some of the messages that you may receive but it’s very important to receive these to make sure that you are able to solve problems quickly and also when you receive any messages from Google they are usually going to give you detailed steps how to actually take action on what they are recommending or they at least provide you with a valuable link that is going to lead you to the right answer so in my search console account if I click on messages as a new account I already have one message and that is to improve the search presence of the site that I am currently setting up the account for now you’ll notice it’s actually going to walk me through some of the steps that we’re walking through here so it asked me to add all the versions of my website that the wwww version I can select my preferred version I can select the target country which we’re actually going to take a look at I can add users some in a sitemap and so on so this is going to walk me through the actual steps of setting up my preferences and making sure that I’m getting everything out of my account now if I go back I can see here that as we just did I added my Google Analytics account and now it’s sending me a message to notify that so anytime you have messages they’re all going to appear here in your message section on the left here we have four main menu items we have search appearance search traffic Google index and crawl so we’re going to take a look at these one by one now each of these has several different sub menus that each address a different issue so we’ll start with search appearance here and this section really helps you to control how your site is displayed as much as possible so you’ll notice this little information button here and this is going to give you a glimpse of what you can do with this section so you can see this is going to show you any issues with how your title actually displays it will help you look at this snippet so your description it also will allow you to look at your site link so anything that is displaying as extra pages in search results that searchers can jump to quickly without having to go to the main link presented it also talks about your URLs if you have Rich Snippets to show off events or reviews so there’s a lot that you can do within this section so let’s start with the first one the first one here is structured data now structured data helps Google figure what your site is actually about and helps it to display Rich Snippets and search results so this is when you want to add structured data markup to your website and this is where you can go gaming org and you can look for the type of content that you have and in your code you could add in this schema to tell Google what your content is about and it can also affect how they actually display your website so this can give you an advantage because let’s say you have events instead of just having a user go directly to your events page it may actually display the dates and the names of the events directly in search results the same for reviews and for products there’s different ways that your data can be presented in search results so structured data is actually found on your website they will show it here and they will let you know whether they find any issues with it or if there’s anything that you can do to improve it since this website does not have any structured data on it at this point they’re giving you some additional information about where to go to figure out what this is about and how you can actually implement it on your site now the next one is rich cards and this is something that’s actually new that Google is testing out right now so if you look at this we have our standard results that we’re all familiar with in Google we have rich snippets that you’re probably familiar with they’re giving the example of recipes here that they actually show the URL they show the description but then they have a little picture and you can see they have reviews that are displaying it tells you the time it takes to actually make the recipe and now what they’re testing out is rich cards so this is very similar to Rich Snippets but the display is changed so here now it shows the image of the recipe the name of the recipe the site is displayed on reviews how long it takes to make the recipe and then users can scroll horizontally through those different recipes just like the one they want so it’s just a different way to display the same data right now this is only being used for a number of categories so this site doesn’t really need to use rich cards at this point but if you are using a website that has recipes or I believe movies different events like that you may be able to benefit from rich cards now data highlighter is the next one we’ll take a look at now this is a pretty neat feature because this is one that will let you if you are going to be displaying reviews or you are going to have then and a number of other data as well that will take a look at so you can see below I’m sure you’ve seen some of these search results that have reviews right here directly in the search result it shows off here upcoming events right here so this will help you display that data directly in search results so even let’s say if you are appearing 3rd or 4th in search results you may still receive a higher click-through rate than maybe those results above you because you have additional debt you have the stars for the reviews that attract attention you have a list of events that attract attention so make sure listing actually stand out from all the other search results you can experience a higher click-through rate even if you have a lower ranking on that first page so what this page allows you to do is tag the data directly on your website simply by highlighting it and telling Google what this information is and then it will know about this information and they may choose to display it in search results so what I can do is click the start highlighting button and I can enter my homepage I can insert a inner page if I have a particular article or an events page I can insert that directly here and then I want to select the type of information that I’m going to be sharing so here I can choose from articles reviews events I have local businesses that are listed movies products restaurants software applications TV episodes so you can see you can display a lot of different information directly in search results so here I’m going to reference a particular article and then I’m just going to tag this page now you can choose to tag this page in others like it it’s going to let you select those other pages and automatically apply the same settings across those pages now what it’ll do is it is going to bring up the actual article on the website so what you can do is you simply highlight the different sections here so I’ll highlight the title and then it’s going to give me a drop-down I can tell Google what I’m highlighting so here I’m going to say title and then you’ll notice over here on the right-hand side it’s going to add that information in now there’s author date published if I want to add the image if I want to add a category if there is a rating so let’s say there’s an article here about a particular piece of software and it has different reviews all I need to do is I can highlight the reviews on the page and then select rating and just like I did for title same thing with votes so what I would do is I’m going to go through and I want to highlight the author the date published I can go through and select a particular image let’s see just select the image as an example and I can select that and that’s going to highlight the main image for that article so that may affect how it is actually displaying and then when I’m done I can simply click publish and then as you can see here it’s going to tell you which pages you actually have published which data you actually have already submitted to Google so Google is now going to better understand the content of these pages and may choose to display it differently in search results which can increase the number of clicks you get to your site so let’s look at HTML improvements now if you have a brand new set up here it probably has not had time to crawl this site yet and be able to display the information in your account but what’s going to happen here is Google was going to look at your HTML they’ll look at your meta tags and they’re going to display any errors that they find so if they find duplicate titles or duplicate descriptions or titles that are too long for example any issues that they see they’re going to display those directly here so that way you know which ones need fix you can change titles that are too long change titles that are duplicate of one another and then it’s going to help you improve your rankings now next you have site links so if you’re not familiar with site links if you see site links in search results you’ll see the main title of the article or the website you’ll see the URL and you’ll see the description and then you will see several other links below that research result and those typically will link you to other popular pages or relevant pages on the website so now you cannot directly influence these particular site links you can’t tell Google which ones you want to appear but what you can do here is in your site link section is you can tell them which ones you do not want them to have appear so if for instance there was a particular page you didn’t like it you don’t really want to send users to that there’s more relevant information you can grab that URL you can throw it in here to demote this specific site link so you can let Google know that’s not the best result to be sharing with the viewers now accelerated mobile pages is the last section under search appearance and this is all again about displaying better pages for mobile users so if they find any errors with your mobile pages they will notify you about that here and give you suggestions but this is also going to let you specify specific pages which they are calling amp accelerated mobile pages so these are pages let’s say if you have two pages one that you present to anyone that is using a desktop versus any one that is using a mobile device and the mobile device ones are going to load faster they may have less graphics maybe laid out a little bit differently but they’re really meant to load very quickly and to look good on mobile devices so this allows you to specify those pages and to direct users to those pages as well so this will help make sure that you are amp compliant with your pages and you can walk through the process of getting started with amp and in doing so this is going to make sure that you have designed your website to be mobile friendly and also to make sure that you are going to be presented in search results for mobile users rather than losing all of the traffic that you could be gaining from those users now let’s go ahead and move on to the search traffic section this section obviously relates to all of the information about the search traffic that you receive on your website and it gives you a lot of valuable information that you can use to really improve your rankings and improve your traffic and everything that’s going on with your website so let’s tackle these subsections one by one again let’s start off with the first one search analytics now if you just set up account Google has not had a chance to process your traffic so it’s not going to be able to display and the information but as Google starts to be able to display your information you’re going to be given a chart of all your different search analytics but you’re going to be able to customize it so you can really drill in to specific pages you can actually compare different pages and this is going to tell you how you can improve the content that’s on your site so let’s look at an example so let’s say we want to look at specific queries we can insert specific keywords here and then we can look at how many clicks we are actually getting for those specific keywords we can look at the number of impressions that this is the number of times that your site has actually been shown in search results but may not have necessarily been actually clicked on then you have your click-through right so this is comparing your clicks versus your impressions to give you the percentage of time that your link when displayed is actually clicked on and then it’s going to tell you the average position your average ranking in search results based on the time frame that you’re looking for so here if we’re looking for specific keywords as I mentioned we can do that here we can also click on pages so if you want to look for a specific page you want to see the top pages that are bringing in traffic to your site you can do that here but if you want to see the top keywords that are coming in to your site you would search for queries now if you target a specific country or a better yet let’s say you targeted a number of countries here you be able to filter the countries that you actually want to serve that you want to target and you can see where the bulk of your traffic is coming from as well you’ll also be able to compare devices how many users are actually finding your site using their mobile device and then search type are they finding your content in web search results are they finding your site via images or videos so this tells you how people are actually coming through to your site and then you can of course look at a date range if you are looking for a specific number so if you want to go back to the past 30 days or you want to compare that let’s say to the past 60 days or where you were last year this will let you compare all of this data now when you actually display the information you can click on clicks impressions click-through rate and position as we talked about and then the graph will update and it is going to show you all of that information so let’s take a look at a site that is actually set up here so here we are looking for specific queries we just want to see what are the top keywords bringing in traffic to the website and it’s going to list out all of the keywords down here below but since I have checked clicks impressions and position it is going to show me all of that information next to these keywords so I can see at a 457 impressions for this particular keyword I get 117 clicks from that and I’m averaging position about two and a half so I’m fluctuating it looks like maybe between position one and four two and three and so I can driving a significant amount of traffic to the site now this information is helpful because there’s a lot that you can really take away from doing these searches and from filtering comparing different pages first is especially with the click-through rate let’s say you have worked really really hard to create very valuable information and you think you have a really great post but you’re seeing that the click-through rate is really low here you’re getting a lot of impressions the page is actually ranking but people aren’t clicking on it so this allows you to go back and adjust the page so that you can work on improving the click-through rate this may be something as simple as changing the title or changing the description so that it’s more relevant or it’s more enticing what I also like to use this tool for is when I look for queries and I look for what are my top keywords that are driving traffic sometimes I’ll find keywords that I’m not intentionally trying to rank for but they’re still driving traffic so let’s say I find a keyword that I’m actually ranking for steadily on the second page but I haven’t put any effort towards that so now with just a little bit more effort to actually try to rank higher for that page I can get some additional backlinks I can optimize that particular page a little bit better then I can see a significant increase in traffic without a lot of effort so this is a great way to use the content that you already have to increase your rankings and increase the amount of traffic that you are getting and lastly if I’m finding any keywords that I don’t feel are related to my actual content that I do want to go back to my page and I want to make sure that I optimize it properly that I make sure I remove anything that is causing me to rank for keywords that are not really relevant and the reason this is important is because I want to make sure that I keep my bounce rate as low as possible and bounce rate is the number of people who actually come to your site and then immediately leave because it’s not what they were looking for they don’t spend time on the site so if you’re ranking for terms that are not relevant you want to minimize that as much as possible because Google does take into consideration your bounce rate when ranking your site as well okay so that’s definitely a place where you’re going to want to spend some time and have a little bit of fun with that but let’s move on to links to your site now if you have a brand new account you’ll find that it’s not going to display any information and this can be because either it has not crawled your website it has not gone out and found the data because you just set up the account and it could also be that you don’t have any links coming to your sites this is really looking at backlink so when you do have backlinks it is going to tell you the number of backlinks that you have in total it’s also going to tell you who actually is linking to you you can see the full report of that and it’s going to tell you your most popular content so this is going to tell you which content people are actually attracted to what makes them want to actually link back to your site you’ll also see at the bottom you’ll it says how your data is linked and that is actually your anchor text so what is the text that people are actually using to link back from their site to your site so this will give you an idea of how varied your anchor text is and if you need to have any of those adjusted as well now internal links internal links are actually looking at links from your site to other pages on your site a lot of times you’ll find that this gives a lot of information here once the information has been found but a lot of times here they’re showing you pages are linked they have a high number of links but that could be coming from menus whether that’s in the header or footer so this isn’t always very relevant to me but it’s a good idea to make sure that you are having internal links so this is a good reminder of that and it also reminds you if you have newer pages that you can link back to older pages or have your older pages link to your newer pages to really how Google crawl your entire site and to be able to pass link juice through your site as well to help rank some other pages now if you click on manual actions what you always want to see is this message right here no manual webspam actions found if for any reason Google has slapped you with a manual action they’re going to tell you about it here they’re going to tell you about why they did it so that you can go back and fix the issue now if you ever receive a manual action this is typically because you either have some bad links going to your site or they’re very unnatural links so you want to go through the process of removing those this can also happen if your site has been hacked and it hasn’t been resolved if there’s a lot of spam going on with your site this is when you can see a penalty for thin content if you really don’t have a lot of value on your site or you have very little words you don’t have to worry about manual actions if you’re building a quality site but anytime that there’s anything that’s spamming going on or more blackhat as they say you may be open to a manual action by Google International targeting is another section that’s very important here because there’s two main options that are going on here you have both the language and the country so this is increasingly important if you are targeting users who speak a specific language or who are in a specific country and this is your way of telling Google that you really want to target visitors in France for example so in the language section let’s say you have a website that has multiple languages then you want to point people from specific countries to the page that actually has the specific language that they would be looking for so this is actually code that will go directly on to the web page so that you can direct users to the correct page so this is the code that you would actually insert to your webpage to give you an idea of what that would look like and then that would be found here this is Google’s way of telling you that they recognize these tags and that they’ll direct users to the right page now under country now let’s say you are targeting users in France again if you have a country specific extension then Google is already going to recognize that you are targeting users in that specific country but if you keep your domain more generic so you’re using a.com a net org anything that’s not country specific but you still want to target specific countries then you want to let Google know that here and you can do that by selecting target users in and then you can select from any country and you can click Save and that is going to update that for you and lastly we have mobile usability so again when you have a site that is just set up Google’s not going to have any information for you will happen is when they do have the information money for you they take a look at your site they’re going to let you know if there’s any issues that they see for presenting your site to mobile users so here for example this one is saying that there’s a small font size and they’re going to tell you which specific pages they see this on so these are very easy issues to correct you simply go to that page you increase the font size and you’re done so this gives you a few different things that you can do to improve your mobile usability which in turn is going to help you increase your rankings as you are compliant with what Google is saying is best for their visitors now we’ve already covered search appearance and search traffic so we have a better idea of how we can help Google to display our site better in search results and also how to better analyze the traffic that is coming to our website and better help Google target the right visitors for us so now it’s time to move on to the Google index section now there are a number of options here in this particular section we have the index status so this is where you can go if you want to find out how many pages Google has actually indexed on your site so this is going to show you let’s say if you submit a sitemap and their next call you can see how many pages have actually been indexed and it’s also going to show you when you’ve had additional pages become indexed and also if you’ve had a decrease in pages that are being indexed so you can identify if there’s any issues that are going on now don’t be concerned if you don’t see a hundred percent of your pages being indexed that’s normal that happens but you want to get your number close to the total number of pages typically that you have on your website and ideally as you’re adding additional content you should see this number continue to rise as well now if you are seeing a lower number of pages and you would be expecting or it’s not near that 100 percent mark then you can click on the Advanced tab and that will let you know if there’s any pages that you’ve actually blocked search engines from indexing so let’s say if in your robots.txt file which is the file where you can actually tell certain search bots not to actually index the pages or not to access your site that could be a part of the problem as well but this typically is where you’re going to block any let’s say WordPress logins or if you have private web pages anything that you don’t want displayed in search results or that there is no need for Google to crawl you would put those in this file another option is if you are not seeing enough pages is to also go back and look at your sitemap to make sure that you have all of the pages actually listed in there it may just be time for you to update your sitemap and resubmit that to Google – they can consider indexing additional pages as well now moving on to the content keywords section this is where Google actually analyzes your site and they search your site for the keywords that appear the most frequently and then they give you a full list of all the keywords that they find starting with the one that is the most prevalent a couple ways I like to use this content keyword section is to see if there is any keywords that I would like to have more content about or that I could really improve my rankings for is if there’s something that I’m not really targeting as much as I could another reason I like to visit this section is for more of a security standpoint sometimes our sites can be hacked or they can have malware and we may not know so we can look for signs of this and one of the ways we can do that is by looking for content keywords and if on this list you see any keywords that you know you haven’t talked about on your site or let’s say you’re running a gardening site or a local plumbing business website but then you see a keywords about gambling or some sort of pharmaceutical keywords then that is a sign that there’s something going on and that allows you to catch it and take action on it before it really becomes a bigger problem now we can also take a look at blocked resources and the blocked resources section is if you have particular code that you have blocked search engines from looking at so this could be CSS for example or your JavaScript files and Google could not see how you actually display your site to searchers then they’re going to list an error here because they want to be able to also see how you actually display your site to the visitors so this is the easy way to know if that content has been blocked by the developer let’s say and this will help you to make sure that Google is indexing your site and making sure that they can see your website like they want to now the last section is remove URLs now hopefully this is something that you will never be using because this is really only to be used in emergency situation so Google really doesn’t want you to use this unless it’s absolutely crucial so if let’s say you have confidential information that has gotten out in search results and you want to make sure that you can temporarily hide that page this is where you can go to do that to make sure that that page does not display but you don’t want to use this for anything simple so if you have like a 404 error or there’s just a page that you don’t really want to drive a lot of traffic to for one reason or another you want to make sure that you’re handling that directly on your site versus going to Google and asking them to remove it so again this is just more for emergency situations now the final section we have here is the cross-section and this is all about Google actually sending out their bot to actually crawl your website to index your pages and to notify you if there are any issues that they come across during this crawl so the first section here that we want to pay attention to is the crawl errors and you’re actually going to see this from your dashboard when you log in ideally you’re going to want to see a screen that looks like this where you have all green you have all checkmarks it’s not displaying any errors but if there are any errors whether this is pages not found if they’re being redirected to a bad page if you have any pages that are being blocked if they’re finding any server errors they’re going to lose that specifically here they’re going to let you know what page they found it on and which error is the most important to fix and then you’ll be able to find additional information on how to actually go about fixing it so it’s very helpful the next section is crawl stats so here it’s going to give you a few different charts that you can take a look at this is going to show you the number of pages that are crawled each day and the total amount of content that’s actually downloaded each day and so this is showing you how much content they’re actually analyzing to index and then below that you’ll see how much time they actually spend at crawling the website so the two things to pay attention here is over time you want to see that they’re calling more and more pages because you should be adding more more pages more and more content to your website if you’re not finding this number going up then this is where you want to look into this a little bit more and you can start by just looking at your sitemap and seeing if it’s really showing all of your pages as well you also want to take a look at the amount of time that Google’s feds crawling your site because the more time that it takes them this should really be a red flag as well because Google wants to see a fast loading site so if it’s taking them a long time it’s likely because your site is not really loading fast so that is going to help you really identify if there’s something going on in your website or if maybe it’s just the host that you’re working with so you can help them better crawl the website now fetch as Google is a neat tool because this actually allows you to enter your website or just enter a specific webpage and you can also select the type of device that you want to check it for and then you can just click fetch and this is going to send Google to your site so that they can show you how they actually see your website and how visitors actually see your website so you can make sure that it matches so here if we’re looking at a desktop version of the site you can get a screenshot here of the site and you can make sure that it looks the same so this is a good sign it means that that both visitors and search bots are seen the same website now we also have a robots.txt tester and we talked a little bit about robots.txt already and this is going to show you what is actually seen by search bots when they’re looking at your site and it’s going to show you what you have asked search bots not to actually look into or index on your website and what it is that you do want them to look into so if you actually want to test something so let’s say if you want to see a particular page is actually blocked you can go ahead and enter the URL here and you can test that out and it’s going to let you know so if you’re not really familiar with robots.txt you and your concern that maybe a particular search bot is not allowed to crawl a particular page or particularly data on your website then you can do a search for that here and test that out and that’ll allow you to in Google Search Console make any changes to your actual robots.txt file to help search BOTS better index your site now a very very important section here is the sitemap section and this is what a lot of people use a Google search console account for so right now we don’t have any sitemaps and this will be the case when you first start your account so you can simply click add or test sitemap and this is going to let you submit a sitemap but to also go back and test it to make sure that Google can actually see your sitemap so you’ll need to actually upload one so there’s lots of ways that you can do it you can do it manually there’s also lots of tools online where if you have a smaller site you can just throw in the URL and you can let them know how often you update your site and click start and for up to five hundred pages it’s going to create a sitemap for you you can upload that to your site and then you’ll be able to submit the you all here and you have uploaded a sitemap for Google to use when they crawl your site for the next time but really in your sitemap you want to be honest about haften your content is changing so if you have let’s say a news feed and you know you’re constantly updated every hour you want to let them know that if you do it weekly monthly yearly then you want to be honest about that as well because there’s really no reason to send Google back to your site to ask them to continually crawl your website and index to make pages if you don’t actually have any new content for them to index now when you do have a sitemap that has already been submitted you’ll be able to see how much content is on the sitemap how much has actually been submitted how many pages have actually been indexed you can break that down by my web pages images videos so it’ll show you all of that information and that’s very helpful lastly now we have URL parameters now this is actually one that if you are not familiar with URL parameters that doesn’t ring a bell you don’t know how to actually work with parameters then this is a section you’re going to want to stay away from really because using this incorrectly can really harm how your site appears in search results so if this is something you are familiar with that I would encourage you to go ahead and look into this section if it’s something that you would need but this is really to show Google when you have the same content on your website but they actually tag it differently at the end of the page name this can help Google know which content to display but like I said if that doesn’t make sense to you then I would leave that section alone now the final section we need to look at is the security issues section now obviously any security issue is a very big issue that you should pay attention to so as Google crawls your website if they find any security related issues at all they’re going to list them all here and that’s obviously something you want to jump on top of immediately so ideally you do want to see this screen here that they have not detected any security issues and this is a good place to come if for instance you are searching for your site and in search results you see a notice that Google puts up if they find any malware on a site that actually warns visitors not to like there that’s a good indicator that something is going on that Google starting to find a problem so that you can come here and this is going to actually give you resources as well if your site has been hacked if there’s any malware that’s been put on your website this is going to give you the steps to take to actually go about resolving those issues as well as I mentioned earlier on if you need additional help with setting up the Google search console account or really interpreting any of the data that it provides you you can go to this Help section and put in your question here and it will give you documentation about it that’s pretty straightforward and very helpful there’s also this other resources section here down at the bottom and this is going to give you a variety of sources as it relates to the Google search console and in improving your site for search results so hopefully by now you can see just how important your Google search console account is and that it’s very very valuable tool to have when you are working on a website especially if you are working to rank a website in search engines Google is going to tell you any issues that they find they’re going to give you this free information and you can really use this as a blueprint to help increase your rankings and to help know what Google sees when they look at your site so if you haven’t already go set up your Google Search Console account make sure to regularly check in on it and make sure that you have set up to be notified of any issues that Google finds if you have any questions about Google search console please leave them in the comment section thank you for reading our blog.


